This is the handiwork of my sweet hubby. He has always been able to fix things, but until retirement almost 6 years ago, he never made anything from scratch with wood. First project, if I recall correctly, was a bird house. That bird house was visible through the window near the changing table (actually, a counter in my craft room) and delighted our grandson when birds visited.
Hubby and oldest son put up walls in the basement, made shelving units and reworked niches in our son's house that first winter. Next he made a headboard for a twin bed in our home, turning it from just a bed on a frame to something very nice. His skills improved and he made a book case headboard for another twin bed, this one going to son #2's house.


While researching plans, a friend said she had plans she never go around to using. It was just the style Hubby was considering. Many of the supplies were already on hand, and we haven't kept track of additional expenses because it might make us woozy. Just kidding....every penny and every hour spent has been worth it.
Now that I've written all that background, here is the DOLL HOUSE as she stands today.
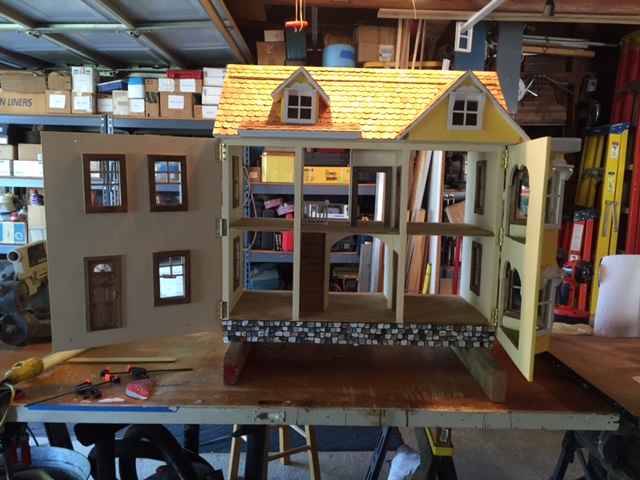
Doll house, open, front view without porch attached

One side of the house with half of the front standing open

The other side

Back which will remain uncovered

A peek into the rooms

Hubby built the railing and the stairs

A piano hinge allows the room to open below the peak for access to the attic's 3 rooms

He didn't want to build a 2nd set of stairs so the attic has a trap door. The hinge is from a kitchen cabinet in my childhood home. Sweet bit of history that our granddaughter will have something from her great-grandparents in this house.

The only finished items purchased were the door, door knobs on both sides of the door, the uprights on the porch (but the rails and spindles were hand made) and over 2 bags of individual roof shingles

The shingles were glued one row at a time and clamped to dry.

Here is the front, closed, without the porch attached.

You can see enough of Hubby to get an idea of the size of this DOLL HOUSE

My only contribution so far has been to say "oooh!" quite often and to paint the rock foundation.
There are some moldings to be added to the interior, a few paint touch ups and the porch will be permanently attached before this is officially done.
This will be a house to be played with. We have furniture and people from Toys R Us that are of a size and style meant for little hands. If our grand-daughter loves this beyond a few childhood years and wants to upscale the interior, that will come later.
The house is pretty heavy. For the time being and maybe longer (limited space for this at son #1's house) it will sit on top of a green mat on a table in our family room. It just might need some Halloween and Christmas decorations so I'd better get busy.
No comments:
Post a Comment