Apparently this has been around awhile, but if you've never seen it, it is new, right? It was new to me. Finding directions for making the battery operated candle into a cake was easy. Finding directions for the box took a bit more digging.
Battery operated tea lights cone in two sizes that I know of, not in diameter but in height. This one is the slightly taller version.
The striped paper is 5" long by 3/4" wide. The smaller candle would use a strip 5" by 5/8". I used a 1.75" scallop circle punch to cut the top and bottom of the cake out of cardstock, and also punched one out of scrap paper.
The punched scrap paper was used to find the center of the circle by folding it into quarters and snipping off a bit of the point. Placed over one of the pink scallop circles, I marked the center, then cut 4 lines through it with a blade to allow for the candle's flame to poke through.
The top is held in place with bits of Scor tape. If the top of your candle is flat, glue could be be used but mine had a slightly uneven surface. The scalloped edges were bent down to resemble icing but that isn't necessary. Left flat, it also looks cute.
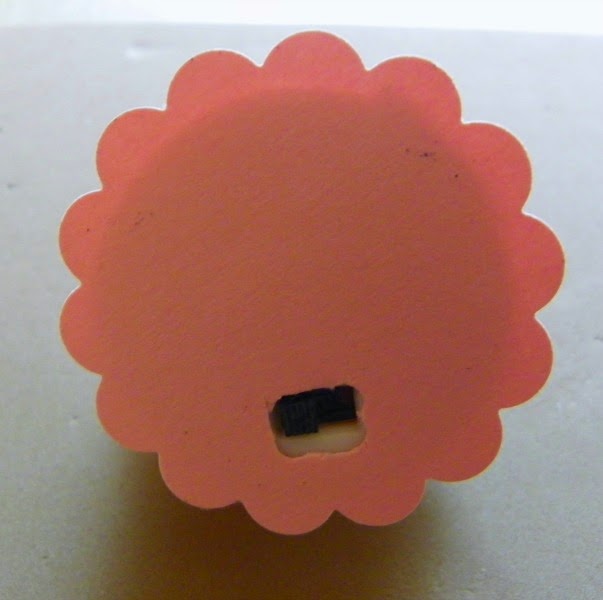
I used the scrap paper scallop to mark where a hole should be cut on the bottom for the switch. I used one large glue dot to hold this in place. It is secure, but I think could be removed if we needed to access the battery cover for replacement.
The top of the cake can be decorated however you please. Purchased embellishments, glitter, pearls, paint...have fun! I used this punch which I think is from EK Success. I've had it for ages. I punched out 5 flowers to place on top of the cake.
Using the ball tool and soft mat from this kit, I shaped the flowers in a cup like manner.
To do this, you just press in and wiggle the tool, or give it a stirring motion.
Here is the result. Much nicer than shaping it by hand. Without this specific tool, use something with a rounded tip over something with some give, maybe the back side of a mouse pad or a towel.
I added pearls to the centers of the flowers and used small glue dots to affix them to the cake.
Now, on to the box. First I tried this design. It was simple enough to create with cardstock and an envelope punch board.
Begin with a 6" square. Line up the first edge at the 2" mark, punch and score. Don't turn the paper yet, slide it over to the left to the 4" mark. Punch and score again. These two steps are repeated on all four sides. On two opposing sides, two cuts are made down to the first score line, making side flaps. Holes are punched in each point.
A fourteen inch length of ribbon was added through the holes to close up and tie the box.
I wasn't happy that the box had a sloppy fit (look at the corners) but didn't know how to engineer the holes for the ribbon to improve this.
Next I printed a template for a 2" box that began with one piece of paper. That really left a lot to be desired, at least in my execution. I didn't even photograph that.
Simple is best. I reverted to elementary school art teachings. We often made boxes and houses out of construction paper. Later on, I made trinket boxes from old Christmas cards. I should have stuck with what I knew, but that wouldn't have been an adventure.
The bottom of this box began with a 5.5" square, scored at 1.75" from each edge. On opposing sides, cut down along the score lines to the first horizontal fold, making flaps that will be folded, glued, and become the sides of the box.
 |
| Sample of scoring and cutting, not the paper used in this project |
The double sided print made a cute box. I used bit of Scor tape to hold the sides together.
The box top was done by the same method, beginning with a 3 1/8" square that was scored at 1/2" on each side.
If I make this again with plain paper for the lid, I think a scalloped edge cut from a strip of paper and added to resemble the cake top would be cute. The bow is from the discarded box attempt, trimmed to fit. It isn't attached yet, I may use a different color ribbon instead of white.
Here is the 'cake' with the candle glowing. I hope my daughter-in-law gets her wish when she receives this!


1 comment:
This is fabulous! What a great idea for a birthday!
Post a Comment