Sunday, April 22, 2018

Spinner Square Pop-up

Karen Burniston does an amazing job of engineering dies that do fun things for cardmakers. Click here to visit her site and see her video of this mechanism in action on a card she made.  I've had this die set for a while but haven't taken the time to experiment with it. I plan to make another card, perhaps without the window on the front which will make some design and color choices easier.

All of the paper choices here except for the circles under the matted cup are Stampin' Up. The card base is Wisteria Wonder, not a favorite color of mine, but it does coordinate well with the teabag paper inside.  I wasn't sure if this first attempt was going to produce a useable card so I didn't select my favorite colors. Does everyone else hoard their favorite colors and embellishments until they feel sure they are going to work?
The stamp set is from Simon Says Stamp, #SSS101695, Coffee and Tea, done with colored pencils.
The directions for assembling the mechanism and how to add it to the card were easy to follow.
Karen also gave tips on how she cut the window, lining up the opening so that it would be centered over the inside image which does not make it centered on the card front. I used an old Martha Stewart die to cut the lace-like strip on the front of the card, cutting that strip in half so that I could line up the straight edge with the square frame around the window. I don't remember where the tiny floral embellishments (not quite sequins) are from.
 This clip shows the how the tea bag pops out from hiding.

I'll be trying another Karen Burniston die for my granddaughter's birthday card soon. She will be 3 next month. She informed yesterday that I need to bring a card that says Happy Birthday and I will need to eat cake. I can handle that!

Thursday, April 19, 2018

Impossible Cards, a style not a statement

I've discovered I can watch YouTube on the living room TV which was nice while I was suffering from a cold and camped out on the couch. I found a card technique that seems to be growing in popularity day by day. I can't take credit for the designs and will link to the blogs and videos that I've watched. I'm here to tell you that these cards are really easy, come together quickly and your friends  (especially those who make cards but haven't seen this yet) are going to be impressed to find out that this card is cut from one sheet of paper without being pieced together! Only the embellishments are glued on.

The card can be made any size you like. If you make an odd size, just be prepared to make an envelope for it.
This first link is for an A2 size Impossible Card by Dawn Griffith  The link includes dimensions on Dawn's blog plus a video of making the card.

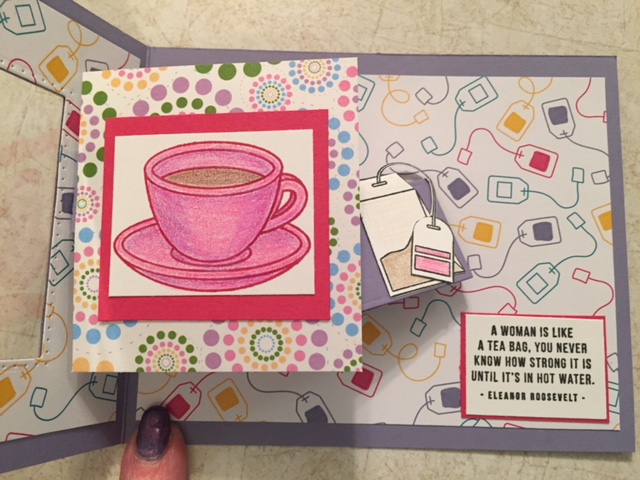
Here is an example I made using Stampin' Up card stock, designer paper and floral punches with birds and a sentiment from Lawn Fawn's Love Letters stamp set.  Most people are going to look at this usual shape and declare there is no way that came the blue base doesn't have more that one piece of blue paper somehow attached.

The first place that I saw this card was on Maymay Made It.  There are links on her YouTube post to her blog with her measurements and additional videos and blog posts explaining how she makes this in various sizes. She created templates for the sizes so that she won't be marking and measuring future cards. She also rotated the orientation in a more recent video so that the part that stands up is portrait rather than landscape.

Here is another link to give you more ideas to spur your imagination: Mixed Up Craft

Oddly enough (unless you know me personally), I did not start out with the simplest version of this card. After watching the YouTube from Mixed Up Craft, I went to another of hers and saw this Triple Twist Impossible Card. I had no problem making the card below but I did manage to screw up making the envelope twice before I got that right.

Other than the dimensions and extra cuts made on the triple twist, the only difference in my cards is that the first one isn't mounted on a separate base. The anniversary card began with black cardstock and was glued to green for stability reasons.

Happy Crafting!

Thursday, April 12, 2018

From the mind of an 8 year old....

I'm sitting here waiting for coffee to kick in, waiting for crafting inspiration to hit, waiting for motivation to exercise (maybe I don't recognize that since I've never experienced that?), and waiting for the cold to leave. When I say "cold", I mean both the weather and the fuzziness that is still in my head. Southeast Michigan is finally having 60* spring-like weather for a day or two, but snow is back in the forecast for the first of next week.


Now that I've gotten weather complaints out of the way, time to share my grandson's observation.  He and I went to the show last week to see Sherlock Gnome which was a cute movie. We passed a Toys R Store that is closing soon. He is aware that the entire chain of stores is closing and said something about this. I said, "Does it make you feel sad? I'm sad that they'll be gone." He agreed and added, "In the future, people will look up Toys R Us in the dictionary and there won't be anything there".

That was a simple statement but it made me smile. I love our one on one conversations. Often the best ones happen in the car, probably because there are fewer distractions there (no TV or other electronics).

Now if only both types of "cold" would become hard to find for a while.....

Wednesday, April 11, 2018

Explosion and Waterfall Box, combined!

My alternate titles for this post were Boxes and Bitchin' or Crabby Creations. Neither would draw you in, would they?

It is the second week in April. I thought that I was going to get through the winter without a cold this year. Technically, I did as it is officially spring. I'm just annoyed that it hit me despite my precautions, tired from interrupted sleep and the normal blah feeling that comes with a cold.

Without further whining, I'll present this box that is both an explosion and multiple card box. Credit to the creator (Maymay) and directions are here at Maymay Made It!  The box begins with a sheet of 12x12 cardstock. I don't have much of that size in solid colors, and most of what I do have is textured and when creased, a white inner core often shows. I had recently won a box of paper supplies in a raffle and used the sheet of 12x12 green paper to make the box base. I didn't think about needing the same cardstock to make the lid. Maybe my cold was taking hold earlier than I thought? I had a lot of the orangish-yellow cardstock (8.5x11 size) so I used that for the waterfall mechanisms on the four interior panels of the box and for the lid. 

The printed papers are from Stampin' Up. They came from a coordinated pack of prints, each 12x12 in size. This box was given to a friend who recently vacationed in Hawaii. My prints weren't beachy, but the leaves and flowers reminded me of my trip to Hawaii. 
 
With the lid off, the center of the box is an accordion pleated explosion of black cardstock that could hold 18 photos, embellishments or written comments.
  
Each of the side panels is a waterfall. Gently pulling on the tab causes the panels to cascade, revealing 4 areas of printed surfaces in decreasing sizes. The plain undersides of these panels could also be decorated.


I will definitely make this box again. Maymay has a video in addition to a blog post with the dimensions spelled out for you. 


Monday, April 2, 2018

Easter Egg Hunt

Yesterday was Easter. Because weather can be iffy in SE Michigan, my family (including myself as a child) has never hunted for eggs outside. The Easter Bunny likes to enter homes to warm up and has always hidden eggs and baskets indoors.

My grandson is 8, his sister is almost 3. The Bunny hides dyed eggs at their house and filled plastic ones here. The hunt here includes a list for each of them with clues to follow. His are written clues that he needs to think about, such as "If I had to wash the bow tie that I like to wear, where would I go to dry it?"  His sister's clues were all photos (sorry for the graininess of this image) that didn't show the hidden eggs but led her to where she would find them.
I should have gotten a video of that sweet little girl on the hunt. She is going to be a force to be reckoned with at Black Friday sales as an adult! She ran to a recognized spot, yelled "Got it!", grabbed the egg, looked at the next picture and zoom!....was running to the next location.

Their parents and their uncle (my other son) got boxes of  Nostalgic Candy and cupcakes with bunny toppers.

I used punches and dies to cut out the components of the bunny faces and ears. The brown boy bunnies got bow ties, the girl bunnies for my granddaughter and her mommy got a flower for their hair (or would that me 'hare'? 😉)


Sunday, April 1, 2018

Knitted poncho for a sweet girl....or a teddy bear

My granddaughter is turning 3 soon, and in most clothing, she is wearing a size 4. She is very independent and currently likes jackets with hoods. Making this poncho seemed like it would appeal to her independence (no help required with zippers or buttons) and I was familiar with the basic directions as my sister-in-law has made several of these in infant sizes. Here is the link to the infant size pattern, available for purchase from Fiber Trends or through Ravelry. The designer of both the infant and Valerie poncho (sizes 4/6, 8/10, 12/14) is Bev Galeskas. The Valerie Poncho link is here . I made the size 4/6. This is the poncho view shown on the pattern.
My granddaughter is all about pink and purple, sparkles and princesses, and all other girly girl stuff at the moment. I finished this poncho a few days ago and gave it to her yesterday. I'm not ashamed to admit that I wanted credit for this, not the Easter Bunny who arrived this morning at both her house where dyed hard-boiled eggs are found and here where the bunny leaves plastic eggs filled with candy, coins or small toys for her and her brother. The Easter baskets here have mostly clothing with at least one fun thing to play with. 

The little diva did not want to try it on yesterday but she did like seeing pictures of a stuffed bear modeling it at my house. 

The only changes that I made to the pattern was skipping the knitted design in the stripes on either side of the front and back panels. I wanted to use pink along with the purple both there and in the border. Both of those areas and the hood are done in garter stitch. The pattern in the center panel and on each side is an easy repeat to follow. 
A cooperative model who didn't need bribes (which didn't work on the wee human).
Side view, showing the hood.
The hood drapes nicely when taken down and the pattern also has directions 
without a hood if you want to omit it. 

I used Plymouth Encore yarn because it is machine washable and dryable. The colors are Pastel Pink (0029), Purple Amethyst (0158) and the white is from the Plymouth Starz line, White (G208).