Sunday, November 9, 2014

Peppermint Patties make a Snowman

I saw a cute idea using York Peppermint Patties and paper to make snowmen. I bought a bag of candy and proceeded to get the paper pieces ready. I punched out 1 3/4" black scallops, 1 3/8" white circles and made a hat from Stampin' Up's What's Up punch, cutting the tip of the wide arrow off.  Then I opened the bag of candy and discovered that the mints were not wrapped in a round manner. My original circle punches (shown in the center) didn't cover much of the foil wrapped candy.

Darn it.....that little hat was cute!
I apologize for leaving the Word Window punch in this shot.
I did not use that in either version of the hat. 
I punched larger plain circles (2") and larger black scallops (2 3/8") and used Stampin' Up's Decorative Label punch to make the upper part of the hat. I cut the label almost in half, trimmed the sides of the hat of the part that reminds me of parentheses, and cut a dip into the the top of the hat. The brim was made from the largest label in an EK Success label punch, cut in half lengthwise. The eyes, buttons, berries on the hat and heart are all from Stampin' Up's Owl Builder punch. The leaves are from a small EK punch that I've had for quite a while.


I cut a strip of black paper to connect the snowman's three body parts, using double-sided tape. I got a second strip ready with the same Redline tape to place under the candies. Each candy has a piece of the same tape on the top side. I placed them under each body part before adding the backing strip. The strip is both for a support and gives me a place to add a greeting if desired. The snowman has pale pink cheeks (a Zig marker) and an orange nose (Tombow marker) with a dot of white ink on each eyeball. 


I am happy with him, even if he does have candy wrapper showing.

Shop Hops

No pictures today and no instructions, just encouragement. If you make cards and/or scrapbook, knit, or quilt, you should consider going on an organized shop hop. I suspect other hobbies may do this also but these are my areas of familiarity.

Yesterday was my third experience with a yarn shop hop. One of the stops led to another hop that I will do this coming Friday for card making and related paper crafts. I don't recall how many quilt shop hops I've done, but more than a dozen over many years.

What is a shop hop and how does it work?

A number of stores of the same genre pick a day or pair of days to feature the hop. They prepare special sales and goodie bags to lure in new customers. A "passport" is either purchased for a nominal fee or given at the first shop. With a purchased passport, you have it stamped or punched at each store. When you have visited all of the participating stores (or consider yourself done whatever the number of shops visited), you turn in your passport. Rules will vary as to who is eligible for grand prizes in these events. Sometimes all stores must be visited. Yesterday's hop required six out of eight. A grand prize could be a gift basket of products or gift cards for some or all of the shops.

Quilt shop hops often have drawings at each store, sometimes hourly for smaller prizes. At no cost, this will keep shoppers in the store for another 15 minutes if they know the drawing is coming up. That is good business.

If the shop hop passports are not free, goodie bags (in my experience) are given to everyone with a passport when they check in. Yesterday's yarn shop hop had free passports but in order to get them stamped, a $15 purchase was necessary and then the store gave you a goodie bag. Most stores have mini muffins, cookies or candy out for the shop hoppers. Some have coffee ready, others offer bottled water.

The purpose of these hops are to get people into their stores who might not normally travel the extra 10 miles to visit them or perhaps had no idea the store existed. From a customer's point of view, the fun of this is seeing what stores are offering that your local yarn, fabric or paper store does not. No one store is ever going to carry everything, there are too many manufacturers in each of these markets.

The best part for me has always been seeing sample projects. You may have seen an item online or in a package numerous times and passed it up because it didn't grab you. When that project is on display in a better color combination or with an added bit of something, you can't believe you walked past it all this time.

I went on yesterday's hop with three friends. It was nice to travel together and compare notes. My advice to would be shop hoppers is to keep your eyes and ears open for these events. Check store newsletters, calendars and ask at the check out if the store you usually visit ever participates in shop hops. Search online using "shop hop", your area of interest and your state. Plan your route so that aren't backtracking on your drive and at the risk of sounding like an old lady, wear comfortable shoes.

My advice to store owners, should any of them find this blog entry, is to update your websites and check that features actually work. I am ok with shops that don't have webpages but I am not alone in being frustrated over being told the info is on their website when it clearly is NOT, or to be told for further information, sign up for their newsletter but the link is broken. Checking this is not unlike proof-reading. Knowing what is supposed to be there and what you assume actually works is sometimes just not there and a fresh pair of eyes should check.

One other piece of advice for stores: If you shop is hard to see from the highway, make a mention on your website that will be helpful to a new shopper.

Support your local stores, have fun shopping and create something wonderful!

Friday, November 7, 2014

Hat made with Poppy yarn

The yarn shop where the weekly knitting group meets sells a yarn called Poppy, by Tahki. ( Website here ) The sample in the store was done in brown yarn. Brown seldom grabs my attention so I walked right past it. When another knitter worked on a hat in white with black flowers, I was immediately interested!

There are 10 flowers per skein. You slide them out of your way until instructed to place them according to the hat pattern.
The pattern calls for one size 15 cable needle and a set of double points, also size 15. I rarely used DPNs, preferring two cable needles.

Here is the finished hat on my patient model, a teddy bear.


Here is a close up of one of the flowers with a bead center.


The pattern was easy. The only changes I made was to add a few more rounds of knitting to make the cap taller. The hat made by the other knitter was rather short on her, but was intended for a young niece so she was ok with that. Even adding a few rounds to mine, there was enough yarn left to add a few more although this height was fine on me.

I made this in one evening but not one sitting. I'm guessing it took less than 3 hours to knit.

Tuesday, November 4, 2014

Frosty's hat, meant to hold hot cocoa mix

I wasn't going to do any crafts this afternoon, I was going to clean.

Honest.

But then I read someone else's blog and I had to make this.

Really. I HAD to!! 


This is meant to hold hot cocoa mix with mini marshmallows on top, both in a clear bag so that the marshmallows are visible at the top. The card will hold a greeting or mix info, and be attached to the bag.

I followed these directions of Connie Stewart's. I used the two smallest layers of Spellbinder's Layered Poinsettia (#S5-055) for the hatband ornament, adding white and silver trim with pens to the leaves and a rhinestone to the center.

Now I must go work on dinner. Or maybe make hot cocoa mix......

Sunday, November 2, 2014

Tea light birthday cake in a box

Apparently this has been around awhile, but if you've never seen it, it is new, right? It was new to me. Finding directions for making the battery operated candle into a cake was easy. Finding directions for the box took a bit more digging.
Battery operated tea lights cone in two sizes that I know of, not in diameter but in height. This one is the slightly taller version.

The striped paper is 5" long by 3/4" wide. The smaller candle would use a strip 5" by 5/8". I used a 1.75" scallop circle punch to cut the top and bottom of the cake out of cardstock, and also punched one out of scrap paper.
The punched scrap paper was used to find the center of the circle by folding it into quarters and snipping off a bit of the point. Placed over one of the pink scallop circles, I marked the center, then cut 4 lines through it with a blade to allow for the candle's flame to poke through.
The top is held in place with bits of Scor tape. If the top of your candle is flat, glue could be be used but mine had a slightly uneven surface. The scalloped edges were bent down to resemble icing but that isn't necessary. Left flat, it also looks cute.

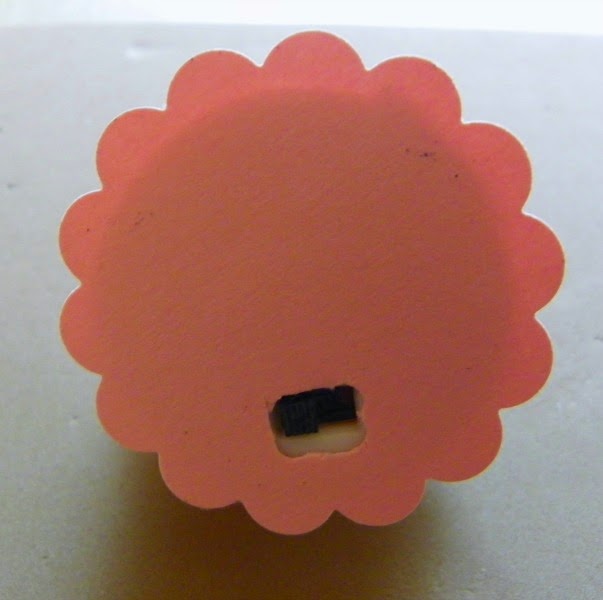
I used the scrap paper scallop to mark where a hole should be cut on the bottom for the switch. I used one large glue dot to hold this in place. It is secure, but I think could be removed if we needed to access the battery cover for replacement.
The top of the cake can be decorated however you please. Purchased embellishments, glitter, pearls, paint...have fun! I used this punch which I think is from EK Success. I've had it for ages. I punched out 5 flowers to place on top of the cake.
Using the ball tool and soft mat from this kit, I shaped the flowers in a cup like manner.
To do this, you just press in and wiggle the tool, or give it a stirring motion. 
  
Here is the result. Much nicer than shaping it by hand. Without this specific tool, use something with a rounded tip over something with some give, maybe the back side of a mouse pad or a towel.
 I added pearls to the centers of the flowers and used small glue dots to affix them to the cake.
Now, on to the box. First I tried this design. It was simple enough to create with cardstock and an envelope punch board. 
Begin with a 6" square. Line up the first edge at the 2" mark, punch and score. Don't turn the paper yet, slide it over to the left to the 4" mark. Punch and score again. These two steps are repeated on all four sides. On two opposing sides, two cuts are made down to the first score line, making side flaps. Holes are punched in each point. 
 

 A fourteen inch length of ribbon was added through the holes to close up and tie the box. 
I wasn't happy that the box had a sloppy fit (look at the corners) but didn't know how to engineer the holes for the ribbon to improve this.
Next I printed a template for a 2" box that began with one piece of paper. That really left a lot to be desired, at least in my execution. I didn't even photograph that.

Simple is best. I reverted to elementary school art teachings. We often made boxes and houses out of construction paper. Later on, I made trinket boxes from old Christmas cards. I should have stuck with what I knew, but that wouldn't have been an adventure.

The bottom of this box began with a 5.5" square, scored at 1.75" from each edge. On opposing sides, cut down along the score lines to the first horizontal fold, making flaps that will be folded, glued, and become the sides of the box.
Sample of scoring and cutting, not the paper used in this project

The double sided print made a cute box. I used bit of Scor tape to hold the sides together.
The box top was done by the same method, beginning with a 3 1/8" square that was scored at 1/2" on each side.
If I make this again with plain paper for the lid, I think a scalloped edge cut from a strip of paper and added to resemble the cake top would be cute. The bow is from the discarded box attempt, trimmed to fit. It isn't attached yet, I may use a different color ribbon instead of white.
Here is the 'cake' with the candle glowing. I hope my daughter-in-law gets her wish when she receives this!


Card with a Sweet View

A simple card for a birthday:


This began with an 11" x 4.25" strip of cardstock. This was scored at 5.5". I cut 4" off of what would become the front of the card. I cut a one inch strip off that piece (1" x 4.25") to use at the bottom of the card. The size of this opening can vary with the image that you wish to display.

Using a plastic sheet that came with cling stamps that I've stored elsewhere, I made a window that was 4.25" wide x 4" tall. I wasn't sure what height I would use, hence the 4" even though the finished viewing window is 3" tall. 

I used Redline (double sided) tape to adhere the plastic to the wrong side of the upper part of the front of the card. With the card closed and a line of this tape applied to the top of the 1" strip of pink cardstock, I lined up the bottom pink border on top of the plastic, having the bottom edge meet the back of the card. Because the plastic window is cut shorter than the total card height, be sure to apply the adhesive to the top edge of the cardstock you use for your bottom border. You don't want to accidentally seal your card shut.


The greetings were done on my computer in a shade of brown that matched the cupcake wrappers in the printed paper. The stamped image of the baker is from Leigh Hannan Impression Obession #MC181 "Cupcake", the cupcake is from There She Goes "A Little Treat".  I used Prismacolor pencils to color the image.


I was originally going to color this with Copic markers. I stamped the image on X-Press It paper with the intention of cutting it out and layering it on top of different paper. After deciding to use pencils instead, I cut the image as a rectangle, rounded the corners and shaded the edge since the paper is a different white from the cardstock inside.

I will do this again, possibly with a scene inside and the outside made to look like a window or a camera viewfinder.

Saturday, November 1, 2014

Creatively hiding candy

Yesterday was Halloween. The weather here was lousy. Cold. Windy. Rainy. Just plain miserable. Guess who has a lot of candy left over?

If you didn't know this, I am following Weight Watchers. While I don't feel deprived, having candy around can be a problem. Not all of it calls my name, but the little Hershey bars do. Make them shut up! Please!!

This won't work. I like broccoli. Besides, if I hid it, I would remember. My memory isn't that bad yet!

This won't work either. Our bowls are all transparent glass.

This is true, but I didn't go door to door with anyone last night. Did I mention that it was cold, windy and rainy?

Given the age of my kids who are adults dealing with their own leftover candy issues, this doesn't apply. But it may have once or twice in the past....

I am SO GLAD that I saw this before trying it! Some who live here (just hubby and I live here, you figure out who I mean) think I rarely cook anymore so the oven would seem to be a good hiding spot.

I guess there is only one thing to do. I need to find a child with a chocolate deficiency and come to their rescue!

Forty-eight hours from now is my Weight Watcher meeting. I can do this! I will either leave the house or wear mittens until then!