I'm a fan of cute and Art Impressions fits that description with many of their designs. One of their newest lines is called Stackers and they made a slider die to work with these designs. No explanation came on the die package or the stamp set. This isn't difficult to figure out but I've been doing this kind of thing for quite a while. Measurements and hints would have been helpful. Perhaps I can help someone reading this.
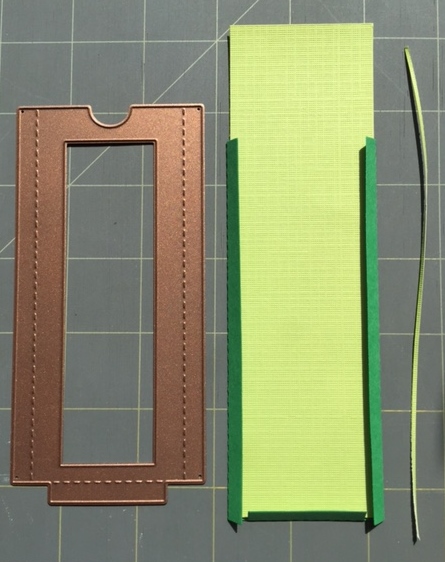
Here is the slider die, one of the Stacker stamps and my stamped image, colored with Copic markers.
The slider die cuts this piece and scores the fold lines. The finished size of the folded slider is 5" tall by 2" wide.
The panel that slides over your image needs to longer than 5" so that you will have a pull tab, and slightly more narrow than 2" wide for ease of movement. I cut it just barely shy of 2" the first time around and shaved off another sliver after testing it for fit.
 |
| This will the be the side facing the card recipient |
 |
| This is the underside where you will apply adhesive |
To create the pull tab, I went all high tech. I looked for a round object to trace.
Cutting on that pencil line gave me this. It is now turned the way it will appear on the card.
Sorry about the weird shadows. We have beautiful sunlight streaming in the window of my craft room but objects outside and sun catchers on the inside made for some odd images.
How did that green slider magically turn brown?? I decided I didn't like that shade of green for this project.
New slider, ready to go in brown with that bright, light green panel.
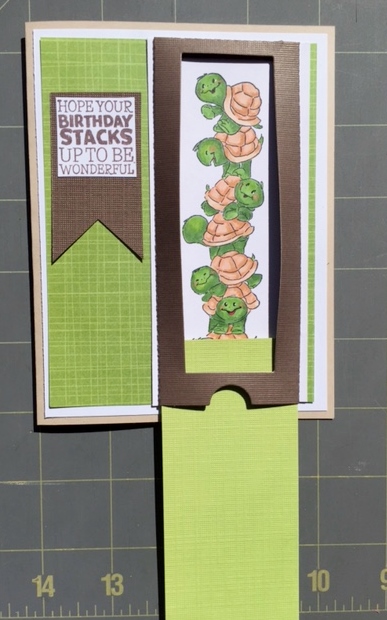
On the standard A2 card in light beige, I added a white mat (5.25" x 4"), then the green printed paper (5" x 3.75") and then had to decide how to cut my stamped image. Because of stamping it rather low in the corner of my paper before coloring, I didn't have a way of centering the stack vertically ro fit this space. I decided to cut it the same height as the green paper, 5" tall. I was concerned that adhering those narrow flaps of the slider housing would be difficult if I cut the stack of turtles exactly 2" wide. I opted to go wider and leave a white border around the brown part of the slider when attached.
I used narrow Scor-tape on the flaps.
Getting this in place was a bit tricky as all of the sticky tape was exposed as I tried to line this up. You can see a bit of a bulge in how the brown lies on the card. I used a textured paper because I liked the shade of brown. I think the original green (thinner cardstock) may have been easier, but this works fine and is good for my first card.
The stamped greeting is part of the Turtle Stackers set.
I considered punching or cutting a window in the green sliding mechanism so that the top turtle would show at all times, but I think I will leave it as is. I can always do that later.
I have two more sets of Stacker images. I think I will stamp them in such a way that I can use that piece of paper as the entire card front, and will cut a mat to fit beneath it and something to one or both sides if I want to add color in the way the green paper does here. That would make lining up the slider mechanism easier. Another option to try would be gluing it in place before the stamped image is on the card and trimming away the excess paper before that assembly is finished. The former sounds easier to me.


No comments:
Post a Comment