Doesn't this look like a shiny, 3-D bell? Would you believe it is a three-layer stamp?
It is! It is from
Holiday Style, a stamp set by Sunny Studio
Even the first attempts weren't bad, not something I can always say about layered stamps, even when using a MISTI. My first attempt was this red bell. Ideally, you need a light, medium and dark shade to get the bell to look its best. My reds weren't different enough in value. I used Stampin' Up Melon Mambo, Watermelon Wonder and Real Red.
This gold bell, using Stampin' Up colors Daffodil Delight (lightest), Hello Honey and Delightful Dijon (darkest) looked better:
Next, I tried Memento ink colors London Fog, Gray Flannel and Tuxedo Black. I liked this but thought it could be better.
I swapped the Gray Flannel for Encore 's Metallic Silver and used London Fog and Tuxedo Black on this and all the other bells I made:
I use my MISTI almost every time I stamp something. I love that if I don't get a good impression the first time around, I can re-ink the stamp and it will line up perfectly. I didn't always have great success with other devices. I began by stamping the sprig of greenery and deciding where the bell would be placed. The first stamp used to make the bell got the lightest color, in this case the silver.
In the view below, the MISTI is open with the ink pad just sitting there for the photo. The yellow things are magnets that hold the paper down to the magnetic surface under the foam pad of the MISTI. The magnets are extremely strong and if the get stuck together, they are hard to separate. You only need to catch your finger between them once to never want to do that again. The yellow on each magnet is a bit of Washi tape, wrapped around the magnet with a tag created to help pull them apart. The stamp is in place on the paper but not stuck to the top plate of the MISTI yet.
The grid you are seeing it the top plate of the MISTI (it opens like a book). Closing this over the stamp causes the stamp to cling to the underside of the plate, ready to ink up and stamp.
The next stamp is this one which reminds me of ice cream topping (yes, I'm hungry!) and uses the London Fog color. I lined up the second stamp over the stamped image on the paper, closed the MISTI to adhere the stamp, inked up and the second image below shows that result.
Same process lining up the third stamp with the Tuxedo Black color.
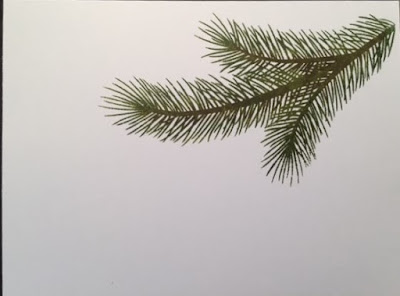
I needed a dozen cards and had only done the greenery on the first few samples to figure out where the bell would hang. Here is the sprig stamp lined up, ready to ink up with Old Olive.
Inked, stamped, and looking very green right here
To make the sprig look a little more lifelike, I scribbled another shade of green, using a Tombow marker on the ends of the needles. You can see some of that here.
I scribbled a brown Tombow over the woody parts of the spring and stamped that. The sprig looks reversed here because the MISTI is open, the stamp has been colored and is ready to be turned (MISTI closed) onto the stamped image.
I added the words from the same stamp set, and inside used "Believe in the magic of Christmas". The bell on this card is the one without the metallic silver ink. It was cut smaller than the last view below it. The green border on the first card reveals a bit of the white card base.
On the rest of the cards, done with silver, gray and black inks on the bell, the green mat is cut to the same size as the card front.
It sounds like a lot of steps, but working production line style, this didn't take long at all. I am very pleased with the result.


