I don't know that this is technically a card as it does not open except for the flap of the present that the snowman is holding. That is where the folded currency will go.
I am a fan of paper punches. This was achieved with punches, one circle template and some cutting and scoring. The snowman's body is a 3.5" circle. You could trace around anything that gives you a look you like, ideally something wider than the present he is holding. Snowmen aren't meant to be skinny.
I used a 2.5" circle punch for his head and hat. One circle cut in half will makes two hats. I was undecided if his hat would be striped or green. The first one became a combination of both.I used Stampin' Up's Owl Builder punch, the ones shown above the owl, to punch out the snowman's eyes. These could be drawn on or cut freehand. The nose was cut free hand. The pompom on the top of the hat was cut from the designer paper half circle, then had the green part of the hat glued on top.
The snowman's feet are small ovals, another Stampin' Up punch. The 1" circle punch cut his hands which hold the present.
Here is the back view of the snowman. I attached his head to the back of the present rather than the top edge of his body. There was more surface to support his noggin this way. The ribbon scarf isn't truly tied around his neck. I cut a length, folded it and glued the crease to hold the streaming ends as shown, then added a bit of score tape (the white rectangle on the red ribbon). I turned that over and adhered the scarf to the back of the present in what would be the neck area.
The other two snowmen used a different patterned paper. The gold glitter-paper flower-like trim on the top of the hat is almost lost in this picture.
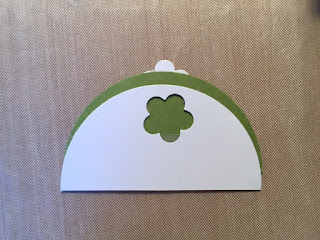
The present (cash or gift card holder) is a 7.75" x 3.5" strip of paper. Score at .5" and 3" with the short side at the top of your scoring board, then rotate and score at 3" and 6.5". Crease all of your folds. The narrow 1/2" sides will be cut away from both sides of the flap. On the first two snowmen with the penguin print gift holders, I trimmed only the flap. On the paper shown above, the 1/2" was trimmed all the way down to the 3" score line, making the gift holder a little less bulky. The image on the right below is before trimming, I should have placed them in reverse order. I used a 1.25" circle punch to take a bite out of the 3" side of the holder. This will make it easier to grab the cash or gift card.
I used narrow score tape on the tabs that are seen in the above right image, forming a pocket. I used two strips of wider tape to adhere this to the belly of the snowman, then attached the head as shown a few steps back.
The only thing left to do is add some repositionable tape to the flap of the present. This will hold the gift closed without ruining the whole snowman when the recipient opens it.
The white highlights on the eyes were done with a white Signo Uniball pen. Explaining this and adding the photos took longer than making them!


No comments:
Post a Comment