Showing posts with label Concord & 9th. Show all posts

Tuesday, April 5, 2022

SCT Crop & Create Cardmaking March 2022

The online card-making event on March 25-27 from Scrapbook & Cards Today was absolutely wonderful. Of the online events I've been part of, theirs has offered the most per event and been the most organized, even when unexpected things occurred behind the scenes. 

The first day featured what would have been "Make & Take" projects in a live event. This first card features a stamp, die, and stencil from Photoplay.


This card is a stitched Hi die from Spellbinders.  I made a second card without the stitching to use a few days after the weekend. 


These are from a company that I didn't know about, and is right here in Michigan, LDRS.


This is from American Crafts.

These are from Honey Bee


There were a few more that I either haven't finished yet. All of these kits and instructors were bonuses in that they weren't announced when we registered for classes. I knew there would be some, but the quantity and quality of product and instruction were great. 

The first scheduled class was Gina Krupsky and Gina K Designs in a class called Floral Frenzy. 


Next was Amy Yingling with products from The Stamp Market. I changed the second card to be a gift tag because I thought it was too bulky to mail. There was one more card that I chose to skip. This class was called Say It With Color. 


The third session was Libby Hickson, stamps from Hero Arts, class called Fun Folds.


The last class on Saturday was Birthday Celebration taught by Jenn Shurkus using Lawn Fawn supplies.


Sunday morning began with Cathy Zielske and Concord & 9th. The second image shows what is inside the card above it. There is a third card that I missed photographing. The class was Clean & Simple Stencils & More!


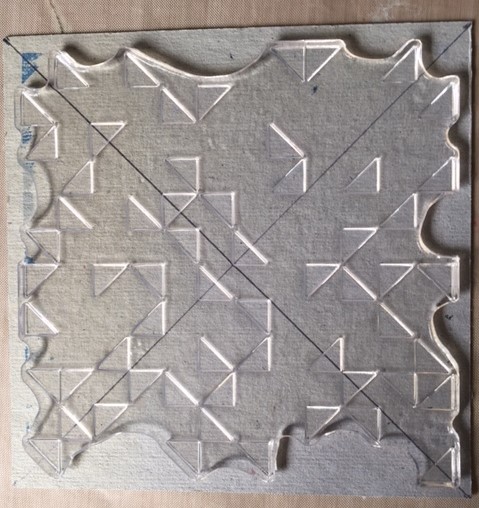
Next is Tayor Vanbruggen with a 4-piece stencil set, Create in Quads, from Taylored Expressions. Inking each layer with one color per stencil onto an 8" x 10.5" piece of cardstock gave us these four card fronts when cut apart. I haven't decided on sentiments for the first three cards yet. 


The seventh class, Spring Is In The Air,  was taught by Laura Bassen for Pinkfresh Studios. 


Last, but certainly not least was Make & Shake by Mari, by Mari Clarke for Honey Bee Stamps. She also taught the other Honey Bee projects on Friday. 


Saturday, June 26, 2021

C9 Summer Camp

Concord & 9th, a stamp and die company, just held their first large online class event. They called it C9 Summer Camp. Six well-known paper crafters served as camp counselors to registered members. The camp counselors were Kristna Werner and Lydia Fiedler teaching watercolor techniques; Laura Bassen and Cathy Zileske teaching Turnabout (a Concord & 9th patented stamp method); and Caly Person and Becky Roberts teaching 3-D papercrafts. Greg Cottrell of Concord & 9th acted as the camp counselor and host. All of the cardstock, stamps, dies, inks, and watercolors used in the items that follow were included in the kits sent to registered campers.

Watercolor classes were taught Friday evening. These two cards used the same stamp and colors, but the techniques were quite different. This class was Kristinia Werner's. I haven't added a sentiment to the first card yet as I am undecided. 

Lydia Fiedler showed us how to make gray paint from the shades of yellow, blue, and red used in the florals above. Amazing! The gray clouds and lake scene isn't finished because I haven't decided whether to add the intended canoe (a separate painted die cut) or so something else. Creating the clouds by daubing the still-wet paint with paper toweling was a great thing to learn. So was using a wet into wet technique to creat rust on the VW van. 

This morning's classes featured Turnabout stamps. Check this website here for Turnabout stamps, what is available and how they are used. Laura Bassen taught these cards. The second one isn't a Turnabout, but if you know Laura, you know she loves rainbow color arrays. 

Following Laura was Cathy Zielski who used the same stamp and dies in both cards but achieved a different feel. 
After a lunch break for me (there were campers from all over the world so it wasn't the same meal break for everyone), we had arts and crafts, beginning with Caly person and these cards that had the same card base but featured different settings. I haven't added sentiments here yet either. These do fold flat to fit into an envelope for mailing, but for the time being, they are decorating shelves in my house.
Last, but certainly not least, was this floral wreath, taught by Becky Roberts who is known for making 3D flowers. The wooden wreath frame is 6.5" in diameter. 
I thoroughly enjoyed each class and each of the instructors, both professionally and in the "campfire" moments when they shared a bit about themselves. 

Once upon a time, I enjoyed traveling to classes held a good way from my home, even far enough away that I flew to classes and spent nights in a hotel. Those days are over for a variety of reasons that are my choices. Being able to take classes from home these past two days was absolutely great! I would love to have met these women in person but I know how meeting them actually goes when you are face to face. It isn't just you and them, it is you and anywhere from 49-199 other people with the same goal of talking to them! 

I will definitely do this again if Concord & 9th offers another event, and am already looking at two other events that feature other instructors whose videos and blogs I've been following. 


Wednesday, July 19, 2017

Triangle Turnabout Success!

Recently I wrote about stamp woes when an image wasn't coming out well. Part of the problem was a flaw in the stamp and part of it was me. First off, Concord & 9th, the maker of the Triangle Turnabout stamp, could not have been better to deal with unless they hand delivered the stamp and brought dinner with them!  Mistakes will happen from time to time. How a person or company remedies the mistake is what is important and Concord & 9th is an example of doing things the right way. Within days of my email to them, I had a replacement stamp in my hand.

By itself and without having seen the finished image this produces, this is one odd looking stamp, right?


The first step to using this stamp is to make a template so that things will line up properly. There isn't anything difficult about this, but I will come back to this statement in a minute. The cardboard behind the stamp is 6 inches square with lines drawn from corner to corner.


This close-up of the center shows how you line up the triangles. 


After placing this in a stamp positioning tool such as the MISTI shown above, you close the cover to adhere the stamp and add your paper to the cardboard template. 


Your paper doesn't have to be 6" square. Your cardboard template will get stained by the inked image that is beyond the paper, but that won't harm the template for future use.

This piece is 5.75 x 4.75 inches. 


In the above sample, I used Stampin' Up ink pads in Daffodil Delight, Delightful Dijon, Hello Honey and Peekaboo Peach.  The result is much better than what I had previously but was a bit off. I cut a new template out of thinner cardboard. It turns out my first template wasn't exactly 6" square. Did I say creating the template wasn't difficult? It still isn't if you pay attention to what you are doing.  


My next sample is 5" x 4" and uses Stampin' Up Denim Dandy, Lost Lagoon, Pacific Point and Tempting Turquoise ink pads. 


First I tried the new template with the black cushion in the MISTI. That didn't work. I didn't think it would but decided to check. Much better below with the black mat back in place. 


This turned out much better! 


My last sample is 5" x 4.5". I used Tim Holtz Distress Inks in Salty Ocean, Seedless Preserves, Twisted Citron and Worn Lipstick. 


Here they are, side by side, waiting to become the background of a card or perhaps die cut into some sort of embellishment.