I made quite a few of these. Each box holds a foil wrapped Ghiradelli chocolate square.
Here are the step by instructions.
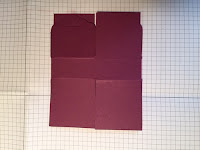
Begin with sheet of paper 8.5" x 5". Score at 2", 4", 6" and 8", then rotate the paper to portrait orientation and score at 2" and 3".
Using Stampin' Up's Scalloped Tag Topper, you will punch the square closest to the 1/2" column, skip a square and punch once again.
Once you've punched both panels, it will look like this.
Cut down each score line from the long edges toward the 2" and 3" score lines. To clean up the ragged parts, use scissors to cut from each ragged hip to the score line. You could also just trim it straight from the top clean edge to the fold line. The rectangles you are cleaning up become the parts of the box that fold over your treats, under the scalloped tabs.
On the 1/2" end, cut away the narrow rectangles leaving just a tab in the middle section.
NOTE: Before assembling this box, I should have scored the scalloped tabs, explained below.
To form the bottom of the box, fold in one side, add adhesive to an adjacent panel, adhere that and repeat.
Here we are at my Oops! part of the instruction.....I should have scored the scalloped tabs before this was formed into a box. It isn't impossible to score them as you see here, it is just easier when it is still flat. Score each tab at 1"
Cut a strip of design paper at 17/8 inch, then cut that strip into four pieces at 7/8" and two at 3/4".
The 3/4" pieces go on the top, the 7/8" pieces on the sides. If your design has a distinct direction to the pattern, you may want to pay attention to orientation when cutting your strip and again when placing the pieces on the box.
Use a ribbon to hold the tabs together and add further embellishments as desired.


No comments:
Post a Comment